Use this manual to set up your shop, take orders, keep measurements and payments together, and give customers a clear portal. Follow it chapter by chapter or jump straight to the task in front of you.
Free to start · No credit card required · Available on Web, iOS & Android
You'll be taken straight to the Shop Setup wizard — no account needed yet
Step 2 — Fill In Your Shop Details
The wizard guides you through three quick setup steps before you create your account:
Shop Details — Enter your business name, choose your custom URL slug (e.g., kofi-tailors.portal.bespokegh.com), select your country, currency, and add contact info
Branding — Pick your accent colors, upload a logo, add a tagline and background image (all optional, can be done later)
Products — Choose starter product templates (Custom Suit, Dress Shirt, Trousers, etc.) or skip to add your own later
Step 3 — Verify Your Phone & Create Your Shop
Enter your phone number (Ghana, Nigeria, Kenya, or international)
Verify with the 6-digit OTP code sent to your phone
Tap "Create My Shop" to launch your tailoring business on BeSpoke
Instant Subdomain: Your custom subdomain is provisioned automatically with SSL — no DNS configuration or technical setup required. It's live within seconds of saving.
Step 4 — Set Up Payments (Optional)
Configure your bank or mobile money account to receive online payments. You can skip this step and set it up later from Shop Settings.
Step 5 — You're Ready!
That's it! You're now ready to:
Add customers and their measurements
Scan handwritten forms with AI to digitize measurements instantly
Create orders and assign their items or services to tailors
Record payments and generate PDF invoices
Notify customers via WhatsApp when orders are ready
Track your business with real-time analytics and reports
Share your portal — customers can check order status at {your-shop}.portal.bespokegh.com
Pro Tip: Invite your team right away! Go to User Management to add staff with Admin, Sales, or Viewer roles. Each team member gets an invitation link they can use to sign up with their own phone number.
✦
Plans & Pricing
BeSpoke offers flexible plans designed to grow with your business. Start free and upgrade when you're ready — no pressure, no lock-in.
Everything in Free + Reports, AI scanner, PDF invoices, push notifications, branding
Business
GH₵ 149/mo $14.99/mo international
∞
∞
10
2%
Everything in Pro + Calendar, fabric management, online payments, white-label
Enterprise
GH₵ 299/mo $29.99/mo international
∞
∞
∞
1%
Everything in Business + REST API, multi-location, dedicated support
The table shows Ghana web pricing first. International web prices are shown in US dollars; mobile pricing is set by your App Store or Google Play storefront. The Subscription screen always shows the amount and currency that apply before you continue.
30-Day Free Trial: First-time web subscribers can try Pro, Business, or Enterprise for 30 days. In Ghana and other supported African markets, the trial starts without a card or an immediate payment. When the trial ends, choose a paid plan and review the amount in Paystack before confirming.
How to Subscribe
On the Web
Navigate to Shop Settings → Subscription in the admin dashboard and choose a plan. Ghana and other supported African shops begin with the 30-day trial and use Paystack when a paid renewal is required. International web shops use Stripe. BeSpoke sends you to the correct secure billing page automatically.
On Mobile (iOS & Android)
Go to Profile → Manage Subscription in the app. Browse plans and subscribe via the App Store (iOS) or Google Play (Android). Your shop tier updates automatically once the purchase is verified. Download for iOS · Download for Android
Restore Purchases: If you've previously subscribed, tap Restore Purchases at the bottom of the subscription page. Useful when switching devices or reinstalling.
Managing Your Subscription
iOS: Manage or cancel via Settings → Apple ID → Subscriptions on your device.
Android: Manage or cancel via Play Store → Subscriptions.
Web: Tap Manage Billing in Shop Settings. Paid Paystack subscriptions open Paystack's management page; Stripe subscriptions open the Stripe billing portal.
Subscription Status
Your subscription status is displayed in Shop Settings with a color-coded badge:
●Active — Subscription is in good standing
●Trial — 30-day free trial period
●Canceling — Active until the end of the billing period
●Past Due — Payment failed; update your payment method
●Canceled — Subscription has ended; reverts to Free tier
Grace Period: If a payment fails, you have a short grace period to update your payment method before features are restricted. The app will notify you if action is needed.
BeSpoke Admin is your comprehensive command center for managing your bespoke tailoring business. It handles customers, orders, products, tailors, fabrics, payments, and reporting — all in one place. Each shop gets its own custom subdomain at {your-shop}.admin.bespokegh.com.
Login
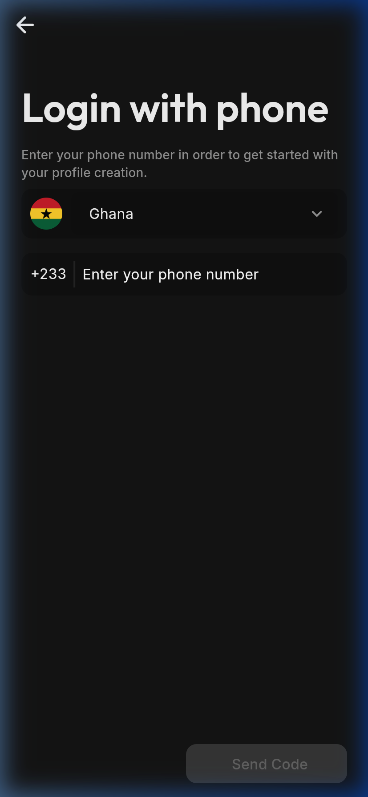
Sign in with your phone number. You'll receive an OTP code to verify your identity. Only authorized staff can access the admin panel. After logging in, you'll be automatically redirected to your shop's custom subdomain.
Can't get a text? When signing up on bespokegh.com you can choose "Sign up with an email link instead" — we email you a secure one-tap link that signs you in without an SMS code. Handy if your network is dropping OTP messages.
Phone verification loginWelcome splash screen
Loading Screen
When the app starts, you'll see a branded loading splash with the BeSpoke logo, a progress bar showing download progress, and helpful tips about your app's features. The tips rotate every few seconds — look out for suggestions like "Add your first 5 customers to unlock insights" and "Set up Mobile Money to accept payments instantly." Once the app finishes loading, you'll be taken straight to your dashboard.
Dashboard
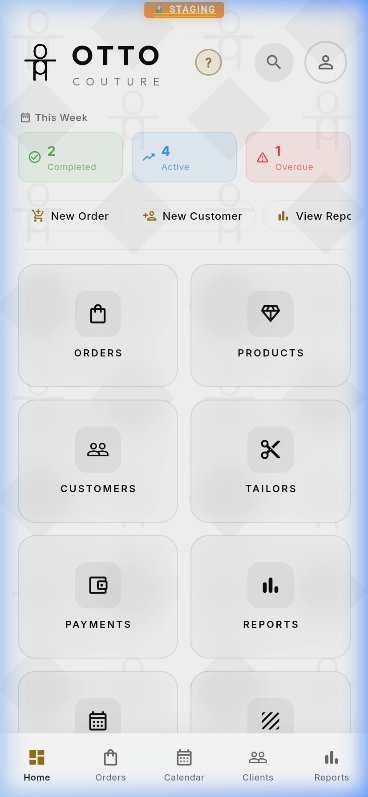
The dashboard adapts to your shop and answers one question first: what needs me right now? It is organised into four zones — Focus (your day at a glance), Pulse (this week's numbers), Do (your highest-value next actions), and Navigate (every section of the app).
The adaptive dashboard: Today digest, weekly KPIs, top actions, and All sections
Today at a Glance
For an established shop, the top of the dashboard shows a Today card that surfaces what needs attention — orders that are overdue, orders due today, and payments to collect. Tap any row to jump straight to that list. When there's nothing urgent, it simply says "You're all caught up" and offers one growth suggestion (like asking happy customers for a Google review). Brand-new shops see the guided First Sale flow here instead.
All Sections
Below your actions is the All sections grid — tap any tile to open Orders, Customers, Payments, Calendar, and the rest. Brand-new shops start with just the essentials (Orders, Customers, Payments, Calendar) plus a "Show all sections" button, so the first screen stays focused; every section is one tap away and the full grid appears automatically once you've made your first sale.
Tip: Use the bottom navigation bar on mobile, or the sidebar on desktop to quickly jump between sections. Look for the feedback icon in the nav bar — tap it anytime to report a bug or request a feature.
✦
Your First Sale
When your shop is brand new, the home screen shows a focused First Sale momentum flow instead of a long setup checklist. It takes you from a client's name to a reviewed order and invoice, then disappears automatically once your first payment lands.
The 3-Step Flow
Start the order — Choose an existing client or add a new client's name without leaving the order.
Add and review the work — Choose a catalogue item with its image, or describe a one-off item, then confirm the quantity, price, ready date, and total.
Send an invoice — Generate a PDF invoice and share it via WhatsApp to get paid.
Each step is tappable and marks itself complete as you go, so you always know what's next. If you start with only a name, the order can still move forward; add phone, email, or location later from the new client's profile.
Skip the typing — scan instead: The flow includes a one-tap "Scan client forms (AI)" on-ramp. Snap a photo of a handwritten measurement sheet and BeSpoke creates the customer and fills in measurements for you, jumping you straight ahead in the flow.
✦
Dashboard Top Actions
The home screen surfaces a short list of Top Actions — the highest-value things to do next for your shop right now. The list automatically reorders itself as your shop matures, so the most urgent and useful actions always rise to the top.
How Actions Are Ordered
Urgency first — Overdue orders and items needing attention appear at the top.
Get paid — Record outstanding payments next.
Build your base — Add or AI-scan more customers.
Everyday actions — Common day-to-day tasks like creating orders.
Grow — Recurring work and growth prompts once the basics are covered.
Top Actions are also permission-filtered — you only ever see actions your role is allowed to perform.
✦
Feature Spotlights
The first time an important feature is available to your shop, BeSpoke may show a short guided spotlight pointing to its real on-screen action — like navigation, Top Actions, the AI scanner, or the guided Create order action.
Spotlights are designed to be quick and unobtrusive: each introduction appears once per feature, stays safely on-screen on any device, and can be dismissed immediately. This means an established shop can discover a useful new release without replaying its original onboarding.
You can always find or replay it: Open Orders and tap +, or use Create order from the home screen. On the guided order screen, tap Help to replay the pointers for the client, item, ready date, and final Create button. A spotlight is never the only way into a feature.
02
Customers
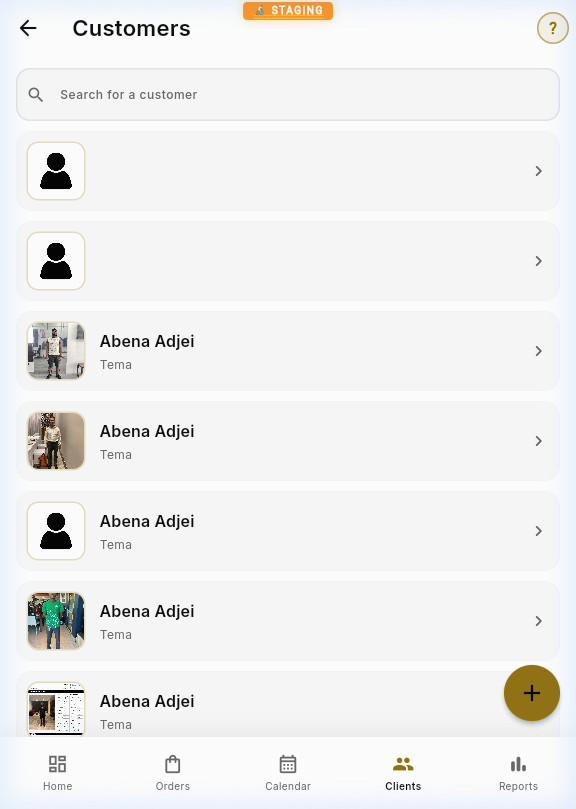
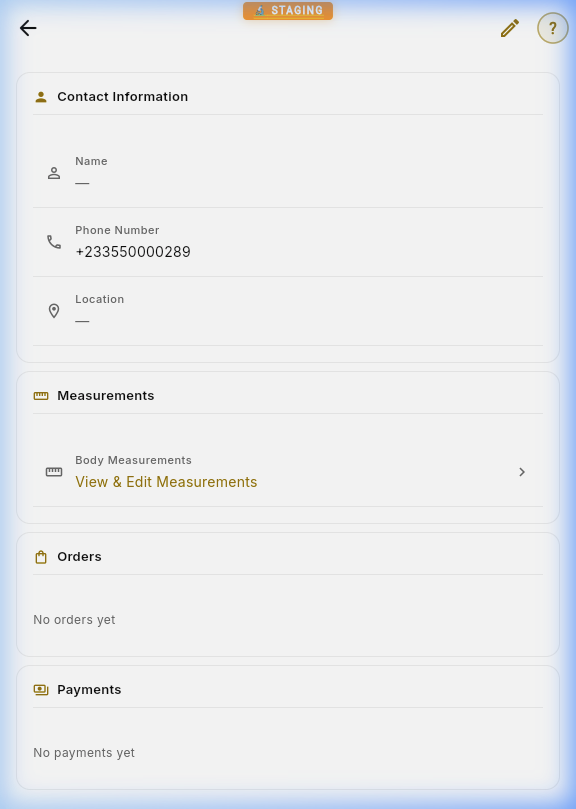
Manage your complete client database. Each customer profile stores contact information, measurements, order history, and payment records.
Customer list with searchCustomer detail view
Creating a Customer
Tap the + button on the Customer List page. Fill in the customer's name, phone number, and location. Tap Save to create the record. You can also upload a profile photo.
Editing Customer Details
Open any customer profile and tap the Edit (pencil) icon in the top bar. This switches from view mode to edit mode. Make your changes and tap Save — or press Back to discard.
Customer Photos
Upload multiple reference photos per customer. Tap the camera icon on the detail page to add images. Photos are stored in Firebase Storage and can be viewed full-screen by tapping them.
Measurements
Open a customer's body measurements from their profile. Standard measurements (including chest, waist, hip, around arm, shorts length and trouser length) and your shop's custom fields are together on one continuous screen. Edit the values, then tap Save and wait for confirmation.
Measurement History: Every time measurements are updated, a snapshot is saved. You can review previous measurements to track changes over time — useful for repeat customers.
Scanning Handwritten Forms
BeSpoke uses AI-powered form scanning to read handwritten intake sheets. You review the customer details and detected measurements before anything is saved. Handwriting can be missed or misread, so check the results against your original sheet. There are two ways to scan:
Mode A — Scan Measurements (Existing Customer)
From a customer's Measurements page, tap the scanner icon in the top bar. Choose Camera or Gallery. In Review Scan, inspect the detected values and their confidence indicators:
Green — High confidence (≥ 85%) — still check against your sheet
Yellow — Medium confidence (50–84%) — please verify
Red — Low confidence (< 50%) — needs manual correction
Standard and numeric shop measurements can be used as destinations. Each detected paper label and its original reading stays available in review, including labels without a confident match. Inspect all paper labels to check a match that already looks correct. Edit the values, resolve the highlighted readings, then tap Save Measurements. Scan Next Form is available after the save is confirmed.
Match Paper Labels Once, Reuse Them
In Review Scan, tap Use as… beside an unmatched reading, or Change beside a current match.
Search for the existing app measurement. For example, match Around arm → Around Arm, S.length → Shorts Length, or Trouser length → Trouser Length. Check what the label means on that particular sheet; similar words are not always the same measurement.
Check the number and its destination unit. No conversion is automatic. When a known sheet unit differs from a known field unit, enter and confirm the value in the destination unit. If the field's unit is not specified, verify it with your shop rather than assuming inches or centimetres.
Choose Use this time for this scan only. Owners and admins can instead choose Use & remember for the named shop. Other staff can use a match for this scan without changing shared settings. Remembering a match needs a connection.
Saved matches belong only to that shop and can be limited to Any section, Upper body, Arms or Lower body. They guide later scans; they do not rename your app fields or rewrite past customer measurements.
To adjust a saved match later, open Measurements → Measurement options → Paper labels, or tap the label icon in Review Scan. Owners and admins can add, change or remove matches. If another admin has changed the settings, reload before saving your edit. A deleted measurement is shown as unavailable: choose another destination or remove its saved match.
Do not lose an unfamiliar reading: A detected label without a safe match stays highlighted. Choose its destination or explicitly tap Skip this reading. If different numbers point to the same field, keep the right reading and skip or rematch the other. Saving waits until those choices are resolved; it does not silently pick between conflicting values.
Mode B — Full Intake Scan (New Customer)
From the Customer List, tap + → Scan Intake Form. Review the detected name, phone, email, location and measurements. Scanning alone does not save a customer. When you save:
Check any suggested existing customer; a shared phone number does not necessarily mean the same person
Choose the existing customer or the shared-contact/new-person option when offered
Wait for save confirmation before finding the saved customer or scanning another form
Tip — Bulk Scanning: After saving one form, tap "Scan Next Form" to immediately scan another. This lets you process a stack of daily intake forms in rapid succession.
Need a new app measurement? An admin can use Measurements → Add measurement field. Numeric fields can then be chosen as scan destinations. If the field already exists under another name, map the paper label to it instead of creating a duplicate.
Interrupted Scans and Poor Connections
Unfinished detected readings and your edits are kept in encrypted recovery on the same device, scoped to the same signed-in account, shop and scan destination. Reopen Scan to resume without photographing the sheet or using AI quota again. The original photo is not stored in recovery; keep your paper or photo available for checking. Recovery is not a cloud backup and is not available on another device.
A recovery copy is not a confirmed customer or measurement save. If the app cannot keep a recovery copy, keep the review open until you can save. If a save has started and the connection drops, use the existing pending-save recovery before starting again. Do not create the same customer or import the same forms again while the result is uncertain. Confirmed saves cannot be replayed as new intakes from an unfinished draft.
03
Orders
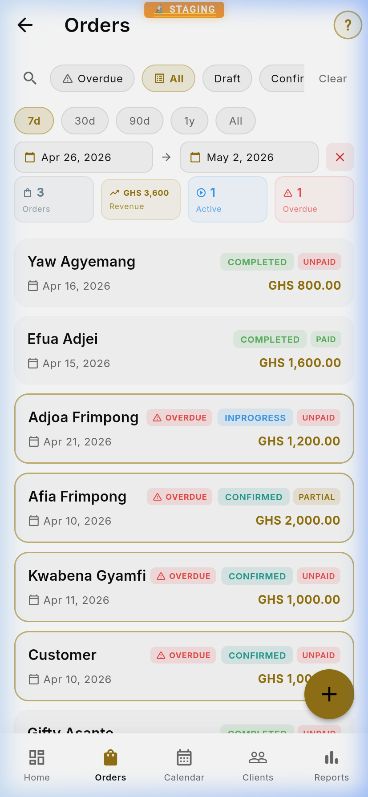
Track every order from creation to completion. Filter by status (Draft, Confirmed, In Progress, Completed), view overdue items, and manage bulk operations.
Order list with status badges and filters
Create the Whole Order in One Place
Tap + on the Order List or Create order on the home screen. The guided order screen keeps the counter conversation together:
Choose the client — Search for an existing client, or add a new client's name inline.
Add each item — Pick from your catalogue and check its image, or add a one-off item without stopping to build a product first.
Confirm the details — Set quantity and price. Assign a tailor now if you know who will handle it, or choose Assign later.
Set the ready date — Choose when the order should be completed.
Review and create — Check every line and the full order total before saving.
Every item automatically becomes trackable work after the order is created. You can assign it, move it through production, and see it on the calendar without having to think about a separate Order → Job setup while taking the sale.
Contact details can wait: A client's name is enough to take the order. Open the client profile afterward to add a phone number, email, location, measurements, or photos.
Your work is protected: A local draft stays on this device for 7 days. If the connection drops after you tap Create, retrying is duplicate-safe and recovers the same order instead of creating another one.
Prefer the previous workflow? Choose Classic form from the guided screen. The previous form and its follow-up editing path remain available there.
Adding or Editing Work Afterward
The guided screen creates each trackable line for you. From the order detail page, tap Add item (or Add service for alterations) to add more work. Each item card keeps its picture, quantity, price, status, and tailor together. Tap More details only when you need the full editor.
Order Detail
The order workspace leads with the outcome: who the order is for, when it is promised, workshop progress, the total and balance, and one Next best step. That action changes with the order — for example, assign a tailor, start work, send the invoice, request the balance, or notify the client. Nothing has been removed: open Order details & more actions for the timeline, notes, payments, reminders, and the existing advanced tools.
Want a reference your team can recognise at a glance? The owner can enable custom order numbers. They appear prominently while the original reference stays available.
Keep moving: Each item card keeps its image, quantity, price, status, and tailor together. Use the inline action for the common next step, or open More details for corrections and specialist fields.
Changing Order Status
Update an order's status by editing the order and selecting a new status from the dropdown: Draft → Confirmed → In Progress → Completed. When you mark an order as Completed, you'll be offered to notify the customer via WhatsApp.
Payment History
The financial summary shows the order total, amount paid, and balance at a glance. Open Order details & more actions to see every payment or record another one. When money is still due, the next-step card also keeps Send invoice, Request balance, and Record payment close at hand.
Reassigning Tailors
Need to change who's making an item? Tap the tailor name on its card to open the tailor assignment picker. Search for a new tailor and tap Save; the item updates instantly without opening the full editor.
Tip: You can also unassign a tailor entirely from the picker if the item hasn't been started yet.
Deleting Records
All detail pages (Customers, Orders, Products, Tailors, Fabrics, Payments) feature a ⋮ overflow menu in the top-right when viewing a record. Tap it and select Delete — you'll be asked to confirm before the record is removed. This means you never have to enter edit mode just to delete something.
Bulk Operations
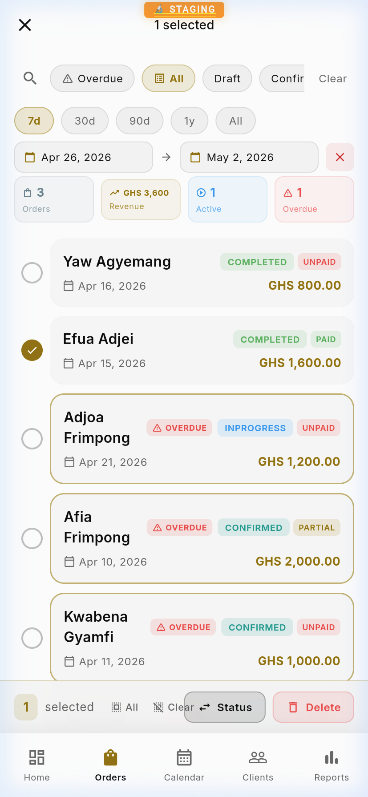
Long-press any item to enter bulk selection mode. Select multiple orders and apply batch actions like status updates or deletion.
Multi-select mode for batch operations
Bulk Actions: Select multiple orders, then use Change Status to move them all to a new stage at once — perfect for marking a batch as "Completed" at the end of the day.
03A
Custom Order Numbers
Give orders a readable reference that fits your shop. Custom order numbers are optional and off by default. They are separate from the permanent order ID and original reference: existing links, payments, and alteration claim tags stay unchanged. If you leave the feature off, keep using BeSpoke as before.
Example: PN2509U Perry Nelson · collection on 25 September · unpaid. PN is the customer's initials, 2509 is the collection date in DDMM format, and U is the payment letter.
Choose Your Shop's Format
Sign in as the shop owner. Open Shop Settings → Order numbers → Set up order numbers (or Edit order number format if already enabled).
Switch on Custom order numbers and watch the large example update as you choose a format.
Add a Prefix if wanted: up to eight letters A–Z or numbers 0–9. Leave it blank for PN2509U.
Choose First & last initials or All initials. For Perry James Nelson, these give PN or PJN.
Choose a Collection date format, then no Date separator or a hyphen. Turn Include payment letter on or off.
Check the example and tap Save. A connection is required to save the setting; if saving fails, your choices stay on the screen so you can retry.
Put the Date in Your Preferred Order
DD means day, MM means month, and YY or YYYY means a two- or four-digit year. Use DD and MM once each, with an optional year. Choose a preset or Custom token order…; use the separate Date separator setting rather than typing punctuation into the format.
Collection date examples for 25 September 2026
Date format
Date part
Example number
DDMM
2509
PN2509U
DDYYMM
252609
PN252609U
YYYYMMDD
20260925
PN20260925U
MMYYYYDD with hyphens
09-2026-25
PN09-2026-25U
The example is a preview, not a reserved number. BeSpoke assigns the final number after the order saves. Until then, the original reference remains available. An older app or an order whose collection date or payment state cannot yet be verified may keep its original reference; this does not by itself mean the order failed to save. Check the saved order before creating another one.
Payment Letters and Matching Initials
U — unpaid: no settled payment. P — part paid: a settled payment below the total. F — fully paid: settled payments cover the total. Pending payments do not count, and an unpriced zero-total draft is not marked fully paid.
The letter updates after a payment or refund is confirmed. The rest of an issued number stays fixed, even if you later edit the customer's name, collection date, or shop format. Always check the order's current date and payment history rather than relying on an old message.
If different customers share initials, BeSpoke tries more letters from their names: Peter Nartey could receive PENA2509U when PN2509U is taken. The first order keeps its number.
Repeat orders, identical names, or remaining clashes get a number such as PN2509-2U. Numbers are kept distinct within your shop and issued references are not recycled, including when a date repeats in another year.
Find and Share an Order
The custom number appears prominently in the order list, order detail, customer portal, invoices, and order-linked receipts and messages. Original reference remains visible for cross-checking. Customers still see only orders they are authorised to access.
On the Order List, open search, enter the full custom number, and tap Find exact order number to search this shop across all dates and filters. Typing still filters the loaded list; the exact search needs a connection. If it fails, keep the entered number and tap Try again when connected.
A previous number that was actually issued still finds the same order after its payment letter changes. For example, an old PN2509U message can find the order now shown as PN2509F. BeSpoke does not invent a PN2509P history if the order went straight from unpaid to fully paid.
Existing orders are not renamed: Enabling the feature applies to new eligible orders, not past orders. Changing or turning off the format does not rename or remove numbers already issued; their payment letters can still update. If you want numbers added to historical orders, contact support for a separate reviewed backfill. Missing or ambiguous information must be checked, not guessed.
03B
Alterations
If your shop takes in alterations and repairs — hemming, taking in, zip replacements — you can run them alongside your bespoke work. Alterations mode is optional and off by default: nothing changes for a shop that doesn't turn it on. When enabled, alteration orders bill from a price book of services instead of your product catalogue, and each order gets a claim tag so you can find the garment fast at pickup.
Turning It On
Open Settings → Services offered and switch on Alterations. Bespoke stays on — a shop always offers at least one workflow. Once Alterations is enabled, a Manage alteration prices button appears right below the toggle.
Progressive: Until you enable it, you'll never see the price book, the workflow picker, or anything alteration-related — the app stays exactly as it is today.
Building Your Price Book
Tap Manage alteration prices to open your service list. Add a service for each job you do — for example Trousers · Hem or Jacket · Take in sides. Each service has a garment, an operation, and a price. Prices can be one of three kinds:
Fixed — a set amount (e.g. ₵30). Starting at — a "from" price for jobs that vary (shows as "from ₵30"). Range — a low–high band you quote within. The kind you choose controls how the price is shown to you and the customer.
Creating an Alteration Order
Create an order as usual (tap + on the Order List, pick the customer). When more than one workflow is enabled, you'll see a workflow picker — choose Alteration. The order is now an alteration ticket.
Adding Services
On an alteration order, the Items section becomes Services. Tap Add service and pick from your price book — the price fills in automatically (you can adjust it; "from" prices are a starting point). Each service stays with its price and tailor, and the order total updates automatically.
Taking One In Fast (the quick way)
At a busy counter, use New alteration — it appears on your Home screen and on the + button on the Orders list once Alterations is on. It's a single screen built for speed: type the customer's name (we add them for you if they're new — phone is optional), tap the services from your price list, and press Take in garment. The claim tag is shown big so you can write it on the garment, and you can print or share the ticket for the customer. About a minute, start to finish.
The Claim Tag & Rack Location
Every alteration order is stamped with a short claim tag like AL-7Q3K when it's created. Write it on the physical ticket you clip to the garment. In the order's Ticket section you can also record a rack location (e.g. "Rack 3 · Slot B") so anyone can find the item.
Find it fast: The tag and location show on the order card in the list, and you can search by the tag — type AL-7Q3K in the Order List search to jump straight to the right ticket.
Invoice & Pickup
The claim tag prints on the invoice under the order number, so the customer's copy carries their reference. If you've turned on the automatic "order ready" SMS (Settings), the message tells alteration customers what to bring: "Bring your tag AL-7Q3K."
04
Products
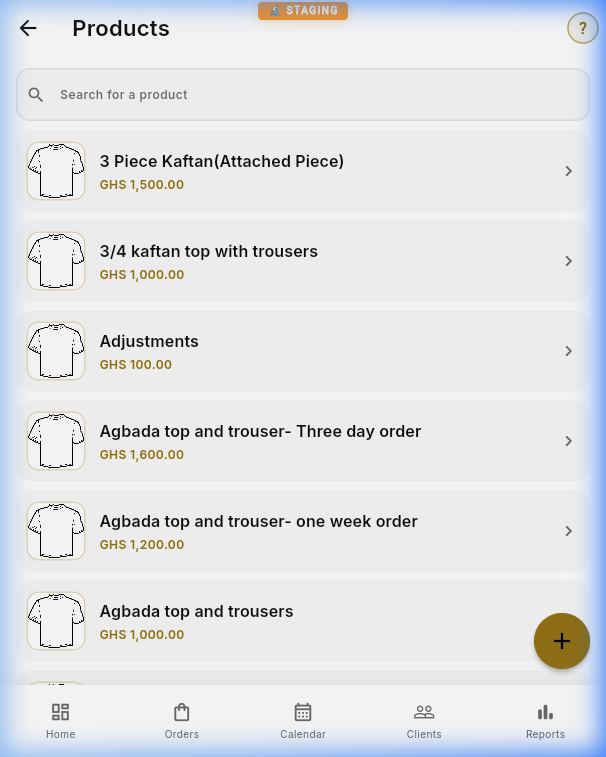
Define your product catalog — each garment type you offer (Kaftan, Agbada, Shirt, etc.) with base pricing and descriptions.
Product catalog with pricing
Creating a Product
Tap + to add a new garment type. Enter the name, base price (in GHS), and an optional description. Upload product images to help your team identify each garment type.
Editing Products
Open a product and tap the Edit icon. Update the price, description, or images as needed. Products can also be soft-deleted — they'll be hidden from lists but preserved for historical records.
Tip: Product names appear in order job dropdowns, so keep them concise and descriptive (e.g. "Agbada – 3 piece" rather than just "Agbada").
05
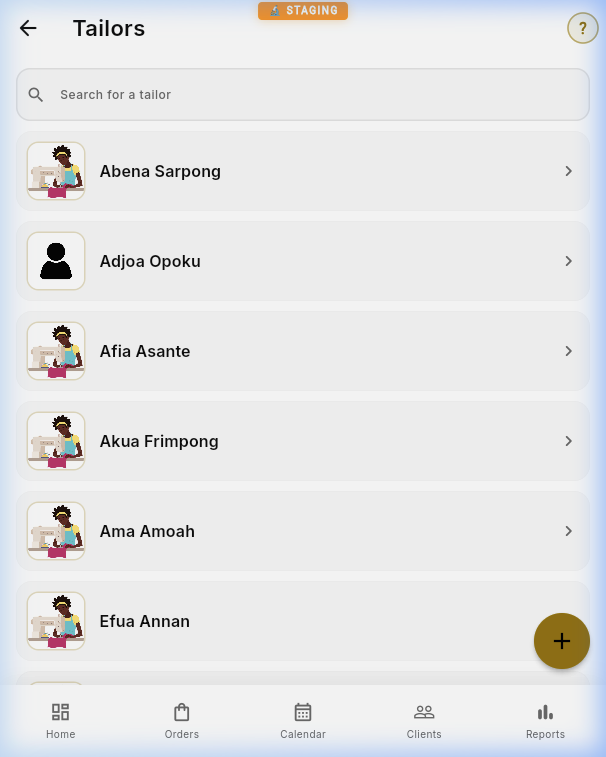
Tailors
Manage your team of tailors. Assign jobs, track workload, and monitor completion rates for each tailor.
Tailor roster and assignments
Adding a Tailor
Tap + to add a new tailor. Enter their name, phone number, and hire date. Upload a photo for easy identification. New tailors immediately become available for job assignments.
Assigning Jobs
When creating or editing a job within an order, select the tailor from the Primary Tailor dropdown. For complex pieces, you can also assign a Secondary Tailor. The Calendar view helps you see each tailor's workload before assigning.
Workload: Use the Job Calendar (Chapter 8) to check a tailor's current schedule before assigning new work — this prevents overloading any single team member.
06
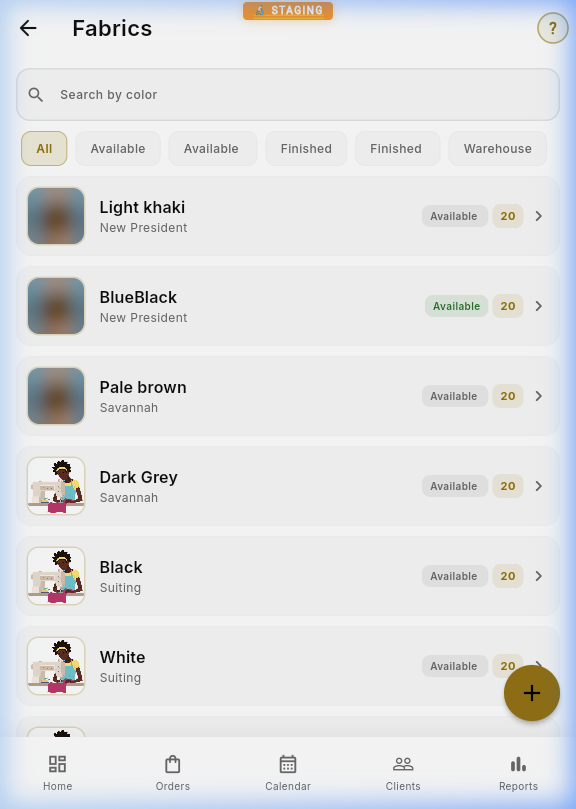
Fabrics
Track your fabric inventory with shop-specific names, multiple photos, colors, source information, and quantity counts. Fabrics are sorted alphabetically by their displayed name, and search matches the name, known type, or color.
Fabric inventory with swatches
Naming a Fabric
Tap + and enter the Fabric name your team normally uses. The shared Fabric Type list is optional, so a missing type never blocks you from recording a new fabric. Existing records continue to display their type or color until you give them a name.
Adding Photos
Tap Add Photos to select several images from your gallery in one step. You can add more or remove individual photos before saving.
Finding stock quickly: The fabric list is sorted A–Z. Use the search box for a fabric name, type, or color, then use the source filters to narrow the results.
07
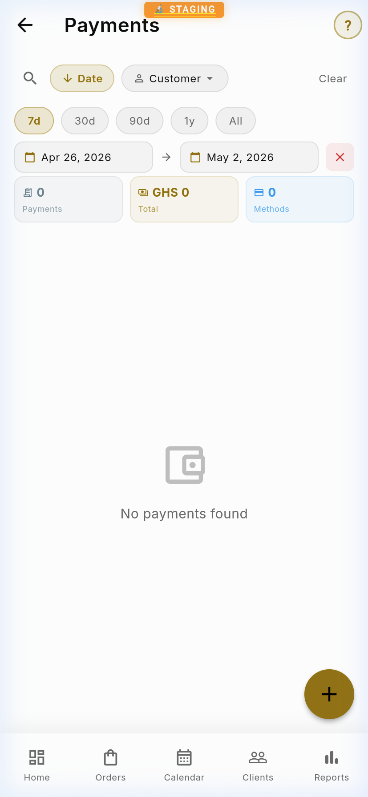
Payments
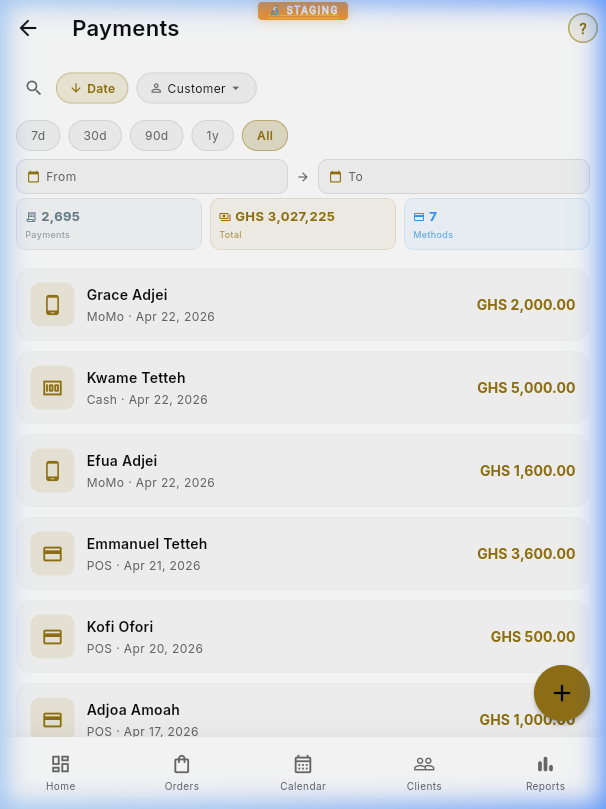
Record and track all payment transactions. See revenue stats, filter by date range, and identify outstanding balances.
Payment list with stats and date filters
Recording a Payment
You can record a payment two ways: from the Payment List (tap +) or from an Order Detail page (tap + in the Payments section). Select the customer, order, amount, and payment method.
Payment Methods
Cash — Walk-in cash payments
MoMo — MTN Mobile Money
MoMo Pay — MoMo merchant payments
POS — Card terminal payments
Cheque — Bank cheques
Bank Transfer — Direct bank transfers
Paystack — Online payments for African shops (GHS, NGN, KES) — recorded automatically
Stripe — Online payments for international shops (USD, GBP, EUR, etc.) — recorded automatically
Generating Receipts
From any payment detail, tap the receipt icon to generate a branded PDF receipt. You can print it directly or share it via WhatsApp.
Payment Settlement Setup
Shop owners must set up payment settlement to receive funds from online payments. The platform automatically detects your region and shows the appropriate setup:
African Shops (Ghana, Nigeria, Kenya) — Connect your bank account or mobile money via Paystack. Verify your account, and payments are settled directly to your bank.
International Shops (US, UK, EU, etc.) — Connect with Stripe. Complete identity verification through Stripe's secure onboarding, and payments are settled to your bank account.
Both gateways automatically split payments: the platform's commission fee is deducted at checkout, and the remainder goes directly to the shop owner. Commission rates depend on your subscription tier (Free: 5%, Pro: 3%, Business: 2%, Enterprise: 1%). Gateway processing fees (Paystack or Stripe) are deducted separately from your settlement.
Online Payments: When a customer pays through the Bespoke Portal, the payment is automatically recorded in the admin system with the correct amount, order link, and payment type — no manual entry needed. This works for both Paystack (Africa) and Stripe (international) payments.
08
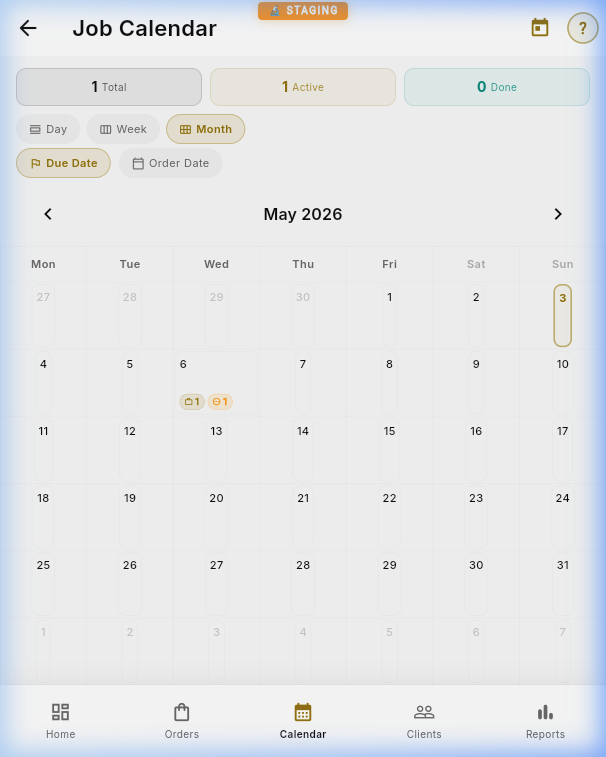
Job Calendar
Visualize your workload on a calendar. Switch between Month, Week, and Day views. Filter by Due Date or Order Date. Click any day to see the jobs scheduled.
Monthly calendar with job events
View Modes
Month — Grid overview with gold dot indicators per day. Badges show total and incomplete job counts.
Week — 7-day strip with grouped job cards showing customer and product info.
Day — Full scrollable list of all jobs for the selected date, with customer name, product, tailor, status, and price.
Date Mode Toggle
Switch between Completion Date (when orders are due) and Creation Date (when orders were placed) using the toggle at the top. Completion date is most useful for production planning.
KPI Strip
The animated counter strip at the top shows: Total jobs in the visible range, Overdue (past due date, not completed), Active (in progress), and Done (completed). Numbers count up with a slot-machine animation.
Day Detail
Tap any day to open a detail panel (bottom sheet on mobile, side panel on desktop). Each job card shows the customer, product, assigned tailor, status badge, and price. Long-press a day cell for a quick status breakdown popup.
Views: Day view shows a detailed timeline. Week view displays columns. Month view shows event badges on each day cell. Long-press any day for a quick status breakdown.
09
Shop Performance
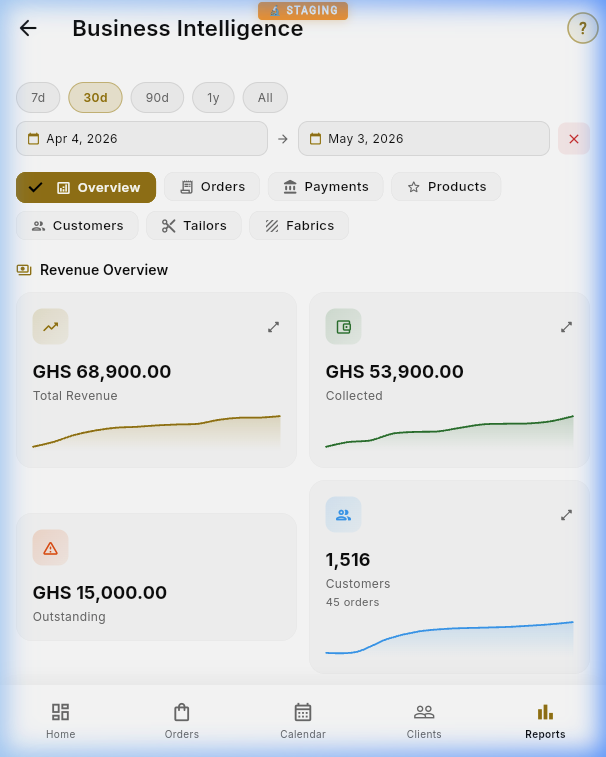
The Reports dashboard provides comprehensive analytics: total revenue, collected vs. outstanding, customer growth, average order value, and repeat rate — all with interactive sparkline charts.
Business intelligence dashboard with charts
Key Metrics
Total Revenue — Sum of all order values in the selected period, with a sparkline showing the trend over time.
Collected — Total payments received vs. Outstanding (revenue minus collected).
Average Order Value (AOV) — Total revenue divided by number of orders. Helps you understand your typical order size.
Repeat Customer Rate — Percentage of customers who have placed more than one order. A key loyalty metric.
Top Products — Ranking of garment types by sales volume, showing which products are most popular.
Date Range Filtering
Use the filter pills at the top: 7d (last week), 30d (last month), 90d (last quarter), 1y (last year), or All (all time). The entire dashboard — including all charts and KPI cards — updates instantly when you change the range.
Interactive Charts
Tap any sparkline chart to expand it into a full interactive view with data points you can explore. Revenue charts show trends over time, while the payment method breakdown helps you understand how customers prefer to pay.
Pro Tip: Compare 7-day and 30-day views to spot weekly patterns. A rising AOV with steady order count means customers are ordering more premium items.
10
Settings & Profile
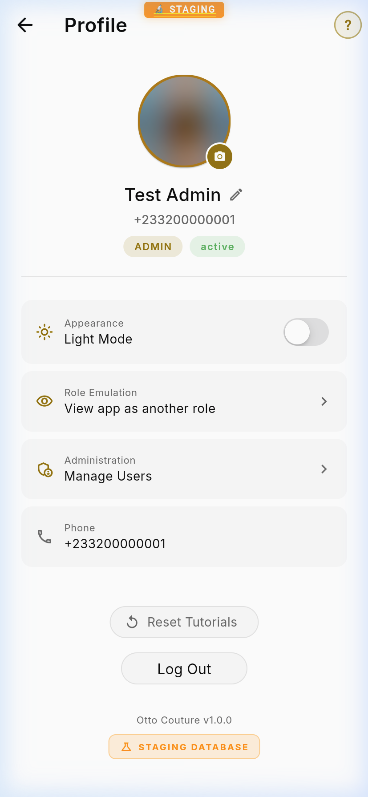
Manage your account, switch between light/dark mode, emulate other roles for testing, and access user administration.
Profile settings with dark mode toggle
Appearance (Light, Dark & System)
Choose how BeSpoke looks from the Appearance control on the Profile page. Pick System (the default — the app matches your phone's light/dark setting automatically), or force Light or Dark. Both themes are hand-tuned for readability and an elegant, premium feel: light mode uses a warm ivory paper look, and dark mode uses a warm charcoal (not a harsh pure black) so it reads rich rather than gloomy. Your choice is remembered on that device.
Role Emulation
Admins can emulate the Sales or Viewer role to test what other team members see. Tap the role emulation option on your profile to switch perspectives — reports and user management tabs will hide when emulating non-admin roles. Tap again to return to Admin.
Help & Manual
The profile page links directly to this Everything Manual at bespokegh.com/manual and the Feedback tracker for reporting issues.
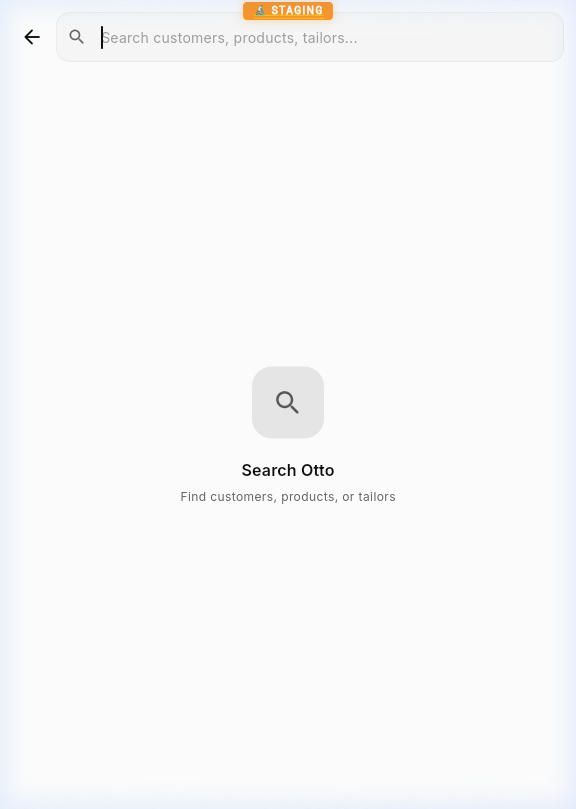
Global Search
Search across customers, products, and tailors from a single unified search bar. Results are grouped by category with instant client-side filtering — no network delay.
Global search across all entities
10B
Shop Settings & Domains
Configure your shop's branding, URL slug, and custom subdomain from Shop Settings in the sidebar (admin-only).
Order Numbers (Owner Only)
The Order numbers card opens an optional initials, collection-date, and payment-letter format with a live example. Only the shop owner can change it. See Custom Order Numbers for setup, date formats, collision handling, and how existing references are protected.
URL Slug & Subdomain
Every shop has a unique URL slug that determines its custom subdomain. For example, if your slug is kofi-tailors, your URLs become:
Admin:kofi-tailors.admin.bespokegh.com
Customer Portal:kofi-tailors.portal.bespokegh.com
To change your slug:
Go to Shop Settings
Edit the URL Slug field
The app checks availability in real-time — slugs must be unique across all shops
Tap Save — your new subdomain is provisioned automatically
How it works: When you save a new slug, BeSpoke automatically registers your subdomain on Firebase Hosting and provisions an SSL certificate. DNS is handled by a wildcard record — no manual DNS setup needed. SSL may take 15–60 minutes to activate on a brand-new subdomain.
Auto-Redirect
After logging in, you're automatically redirected from the base platform URL (admin.bespokegh.com) to your shop's custom subdomain. This ensures every shop owner always lands on their personalized URL.
Shop Branding
Customize your shop's appearance across the platform:
Shop Logo — Displayed in the sidebar, invoices, and customer portal
Accent Color — Tints buttons, links, and highlights throughout the app
Contact Info — Phone number, email, and location shown to customers
Currency — Sets the default currency symbol for prices and payments
Domain Architecture
The BeSpoke platform uses a three-tier domain system:
All subdomains are auto-provisioned when a new shop is created. Shop owners don't need to configure any DNS — the platform handles everything via wildcard DNS records and Firebase Hosting API calls.
Security: Each shop's data is completely isolated via shop_id scoping in Firestore security rules. One shop cannot access another shop's customers, orders, or settings.
10C
Get Found on Google
The Get Found on Google wizard helps new customers discover your shop on Google Search and Maps. Open it from Shop Settings and follow the guided steps to create or claim your Google Business Profile.
Create or Claim Your Listing
If you don't have a Google Business Profile yet, the wizard walks you through creating one in minutes. If you already have a listing, the wizard helps you claim it so it's linked to your shop.
Auto-Detect Your Place ID
The wizard auto-detects your existing listing as you type your shop name and address, then captures your Google Place ID. This unique ID is what powers your one-tap review links and connects your shop to Google.
One-Tap Customer Reviews
Once your Place ID is saved, BeSpoke generates a one-tap Google reviews link. Share it with happy customers so they can leave a review in seconds — reviews are one of the biggest factors in being found and trusted on Google.
Your portal is built for Google too: Every shop's customer portal is pre-rendered for search engines (Jara SEO), with a per-shop title, description, and store details, so your portal can be indexed and rank locally on Google.
11
WhatsApp, SMS & Invoices
BeSpoke integrates directly with WhatsApp for customer communication. After creating an order, recording a payment, or marking an order complete, you'll be prompted to notify the customer instantly.
Send by SMS PRO
On the Pro plan you'll also see a "Send via SMS" button beside WhatsApp in every notify dialog. SMS reaches any phone — including customers who don't use WhatsApp or have no data — so your invoices, receipts and "your outfit is ready" messages always land. The message text is identical to the WhatsApp version, personalized with the customer's name, order number and amount.
Where it works today: Customer SMS is currently available for shops in Ghana. We're expanding to Kenya and Nigeria next — until then, WhatsApp (free, on every plan) covers those customers.
Automatic sends (optional): In Settings → Customer SMS you can turn on automatic texts when an order is marked ready, and automatic reminders for overdue balances — so customers are kept in the loop without you lifting a finger. Both are off by default.
Notify Customer
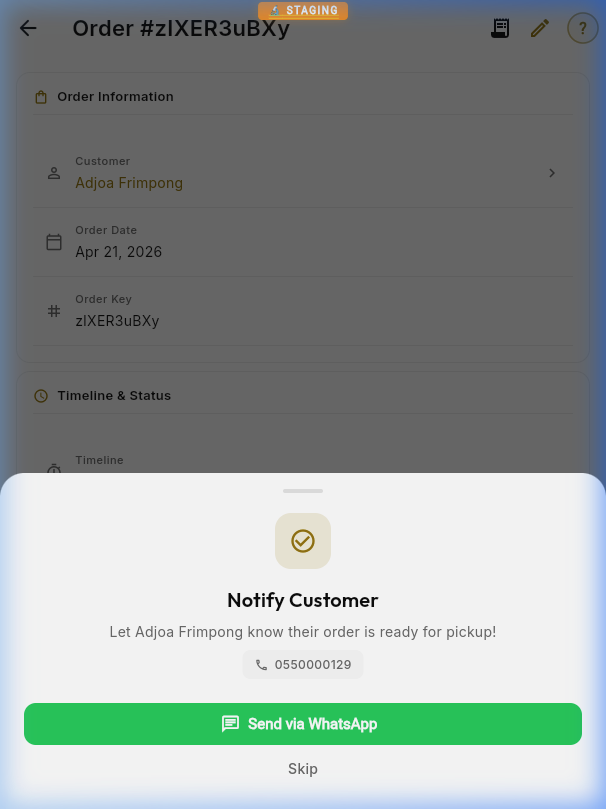
When an order is completed, a bottom sheet dialog appears offering to send a pickup notification via WhatsApp. The customer's phone number is pre-filled and the message is auto-composed.
WhatsApp notification prompt with green send button
Auto-Messages: The app composes personalized WhatsApp messages for invoices, receipts, and completion notices — including the customer's name, order number, and amount.
Order Detail with Invoice
From any order detail page, tap the receipt icon in the top-right or use Send invoice in the next-step card to generate and share a PDF invoice. The invoice includes every item or service, pricing, payments, and the customer-portal link.
Nothing is hidden: The workspace shows the total, amount received, and balance at a glance. Open Order details & more actions for the full payment history and advanced order controls.
Payment Detail & Receipt
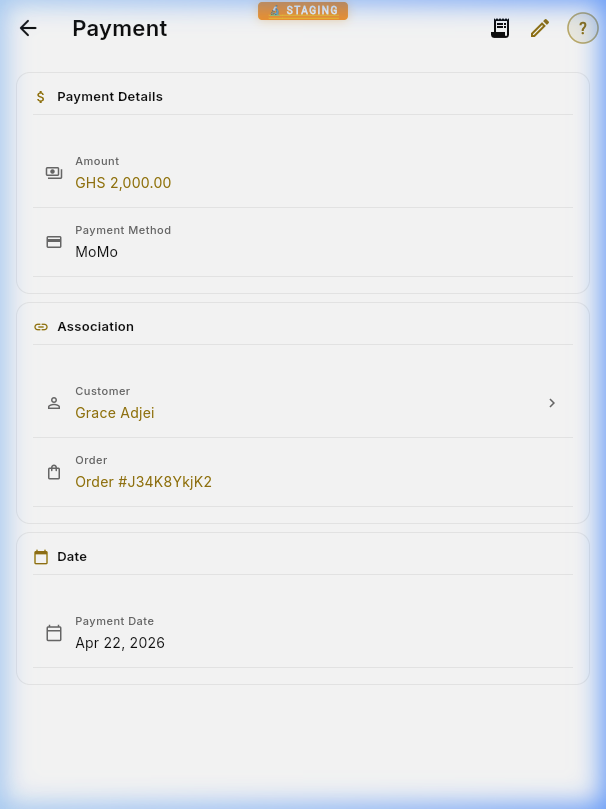
Each payment record shows the amount, method (MoMo, Cash, POS, etc.), associated customer and order, and date. You can generate and share a PDF receipt directly from here.
Individual payment detail viewComplete payments list with stats
12
User Management
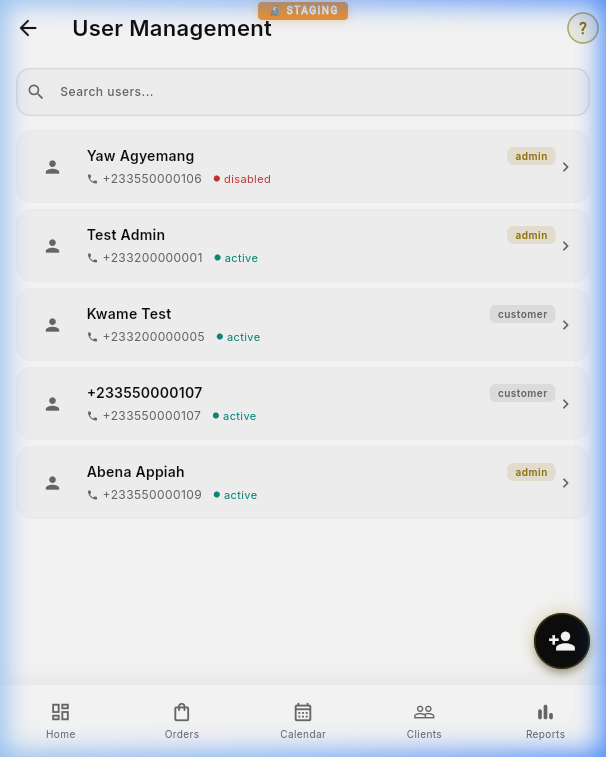
Invite team members with role-based access control. Assign roles like Admin, Viewer, or Customer to control what each person can see and do.
Invite a New User
Step-by-step:
Navigate to User Management from the sidebar (admin-only).
Tap the "Invite User" button in the top-right corner.
Enter the user's display name and Ghana phone number (format: +233...).
Select a role from the dropdown (Admin, Sales, Viewer, or Customer).
Tap Send Invitation.
A share dialog appears — send the invite link via WhatsApp, SMS, or copy to clipboard.
User management with role assignments
Understanding Roles
Admin — Full access: can manage users, view reports, change settings, create/edit all entities, and access the feedback tracker.
Sales — Can manage customers, orders, and payments. Cannot access Reports, User Management, or system settings.
Viewer — Read-only access to all data. Cannot create, edit, or delete anything.
Security: Role changes take effect immediately. When you change someone's role, their permissions update the next time they interact with the app — no need for them to log out and back in.
14
Account & Privacy
BeSpoke takes your privacy seriously. You can permanently delete your personal account data. If you own a shop, that action also erases the shop; if you are a team member or customer, the shop's business records remain for its owner.
Account Deletion
To permanently delete your account:
Go to Profile in the app.
Scroll to the bottom and tap Delete Account (red text).
A confirmation dialog appears explaining what will be deleted.
Type DELETE (in capital letters) to confirm.
Tap the Delete My Account button.
This action is permanent and cannot be undone. For every account, deletion will:
Remove your profile contact, photo, biography, title, notification, and preference fields
Remove your Firebase Authentication account
Remove profile media currently referenced by your account
Remove your access to any connected shop
A minimal deleted-account marker and account timestamps remain so BeSpoke can prevent accidental restoration and document that deletion occurred.
Shop owners: deleting your account also erases the owned shop and its shop-scoped customers, orders and jobs, measurements, payment records, catalogue, tailor assignments, SMS delivery records, and uploaded media. Minimal anonymized security, deletion-audit, and provider anti-replay records may be retained where required.
Team members and customers: your profile is deleted or anonymized and your access is removed. The shop and its business records remain available to its owner and other authorized team members.
Cancel billing first: account deletion does not automatically cancel Paystack, Stripe, Apple, or Google subscriptions. Use BeSpoke subscription management or your app-store subscription settings before deleting the account.
Privacy Policy
Access the BeSpoke privacy policy at any time from Profile → Privacy Policy. The privacy policy is also available at bespokegh.com/privacy.html.
The policy covers:
What data we collect and why
How your data is stored and protected
Third-party services used for hosting, messaging, payments, reliability, and consented marketing measurement
Your rights to access, export, or delete your data
How to request data deletion via email (support@bespokegh.com)
Data Security
All data is stored in Google Cloud (Firestore) with encryption at rest and in transit
Authentication is handled by Firebase Auth with phone OTP verification
Each shop's data is isolated via Firestore security rules — one shop cannot access another's data
Payment information is never stored in BeSpoke — all payments are processed through Stripe or Paystack directly
Bespoke Customer Portal
B1
Welcome & Sign In
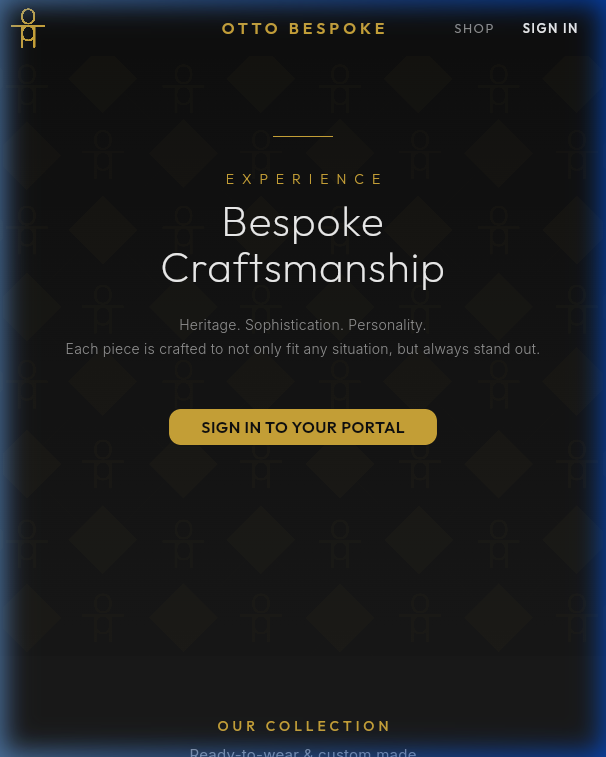
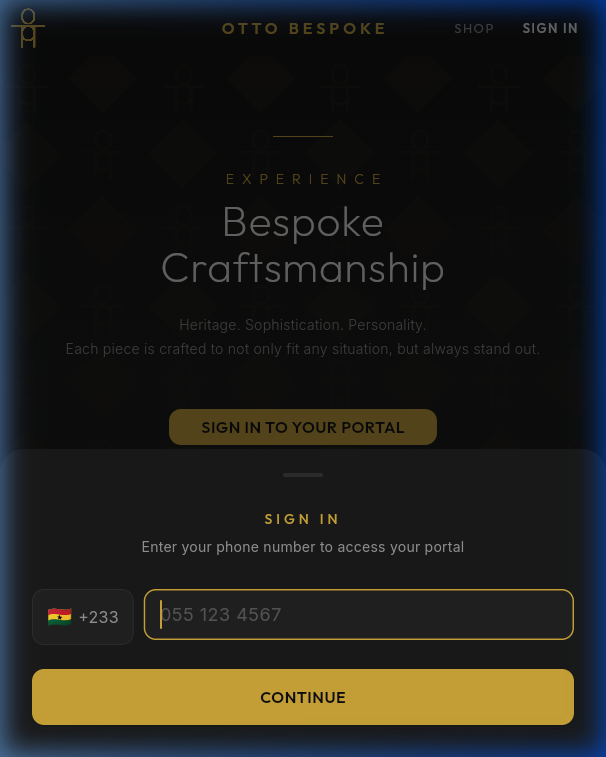
The Bespoke Portal is your customer-facing app. Clients access their orders, measurements, and payment history from any device.
Premium landing pagePhone sign-in screen
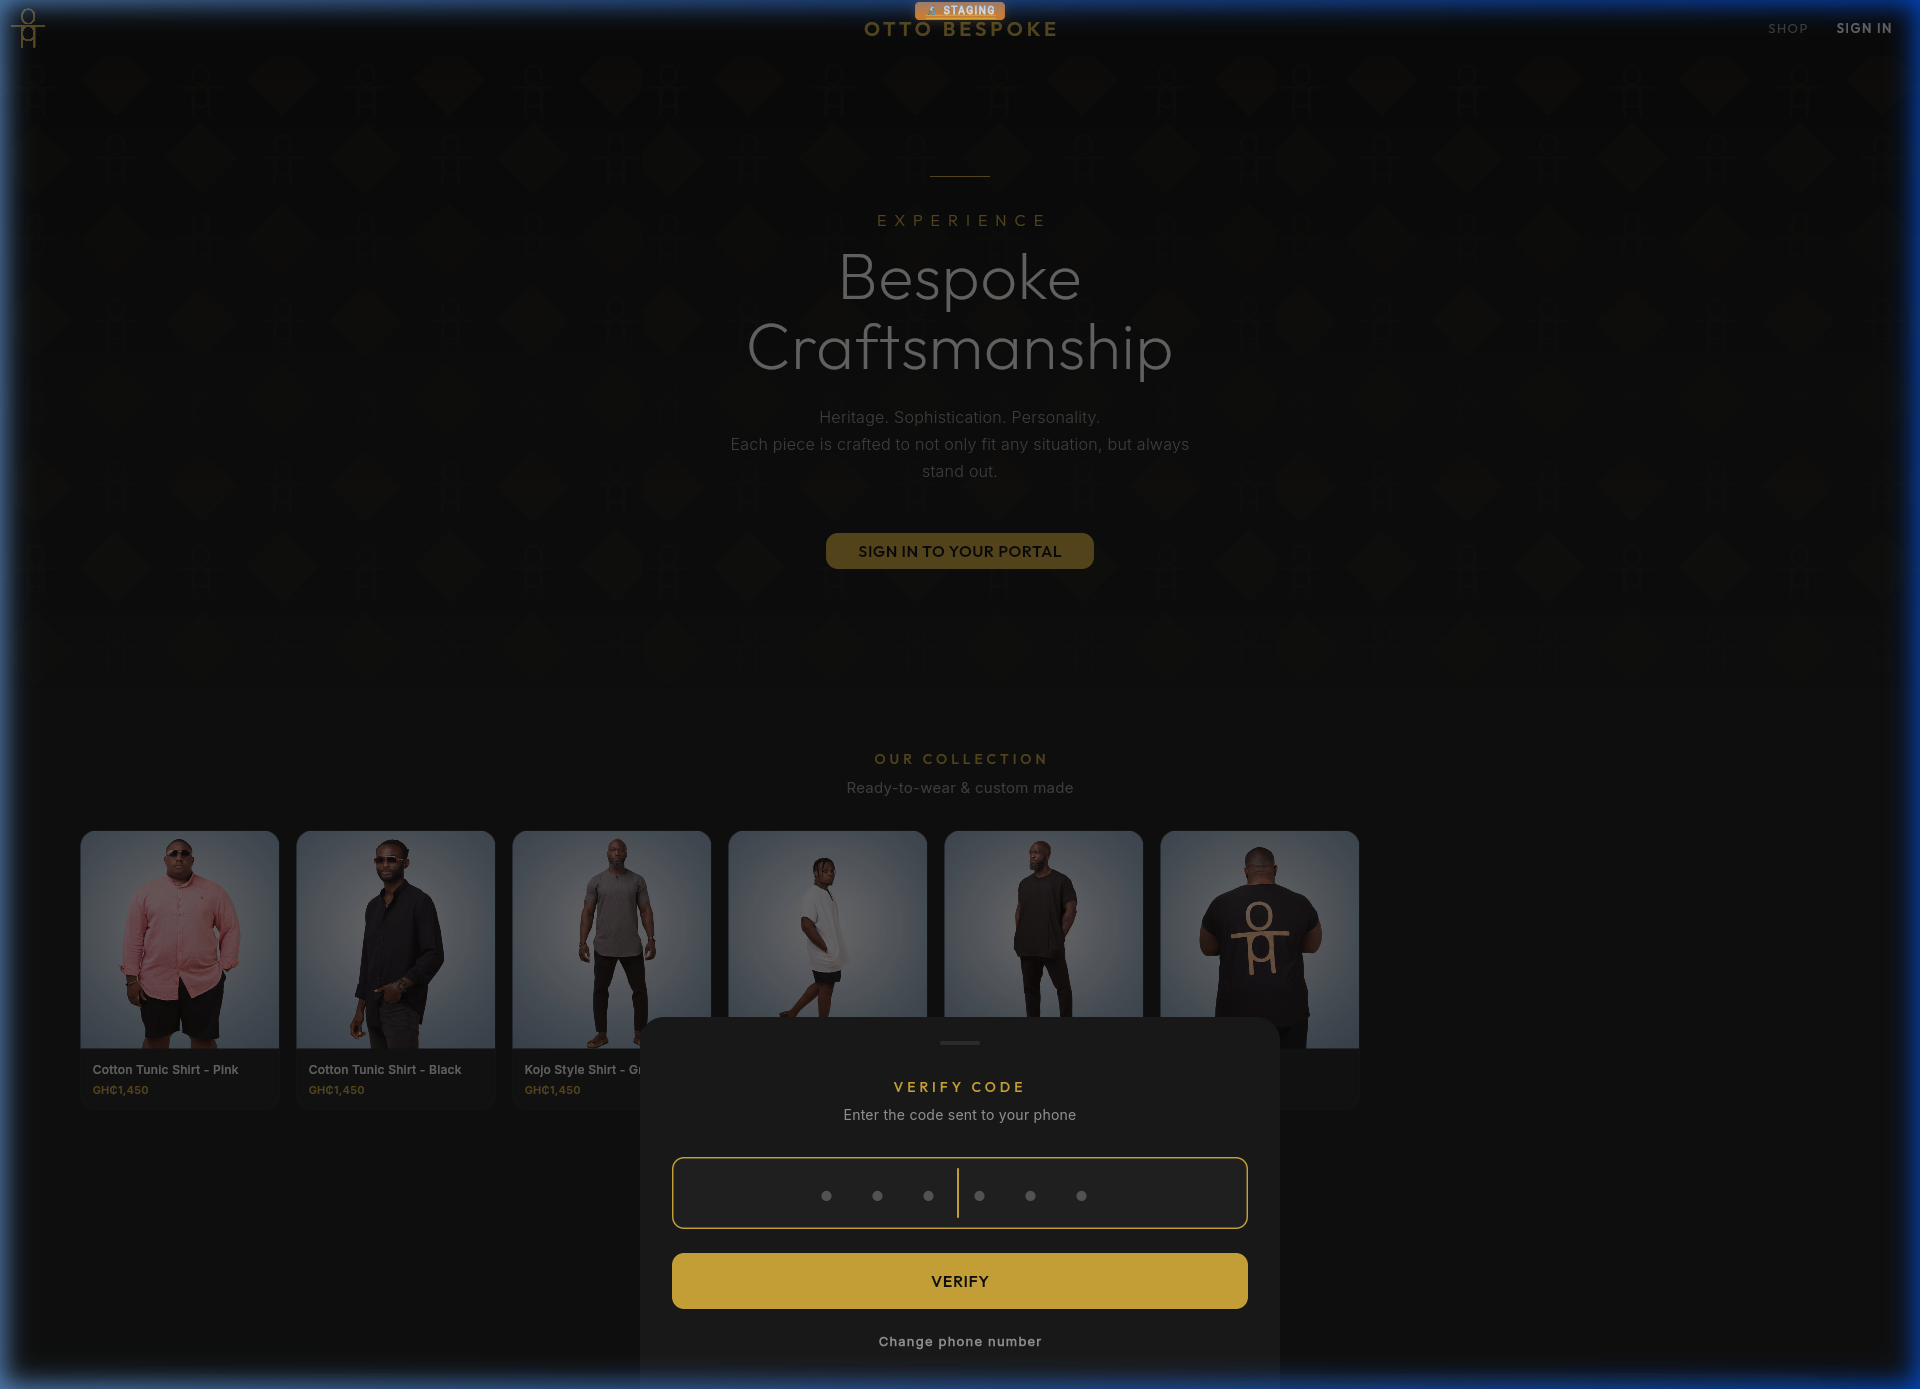
OTP Verification
After entering their phone number, customers receive a 6-digit code for secure verification.
OTP verification step
B2
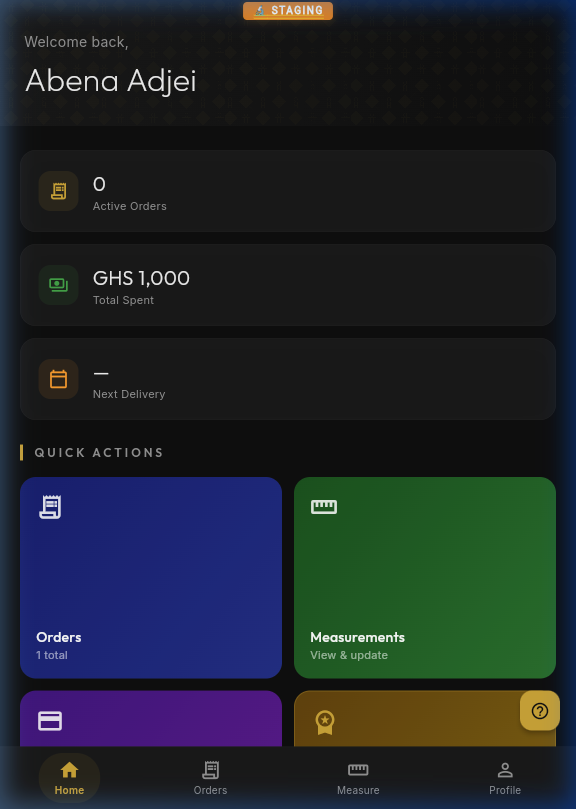
Customer Dashboard
After signing in, customers see their personalized dashboard with active orders, total spent, next delivery date, and quick action tiles.
Personalized customer dashboard
B3
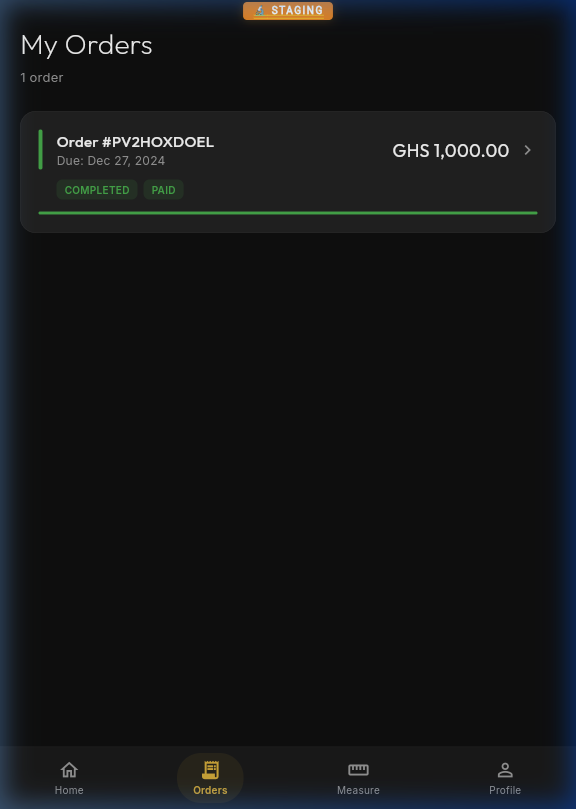
Orders & Payments
Customers can view all their orders with real-time status tracking and a complete payment history including payment method and date.
If the shop uses custom order numbers, customers see the assigned number prominently on their dashboard, order list, and order detail, with the original reference underneath. The same number is included on invoices and receipts linked to that order. Existing order links still work, and a custom number does not grant access to another customer's orders.
Order list with status badgesBody measurements
B4
Measurements
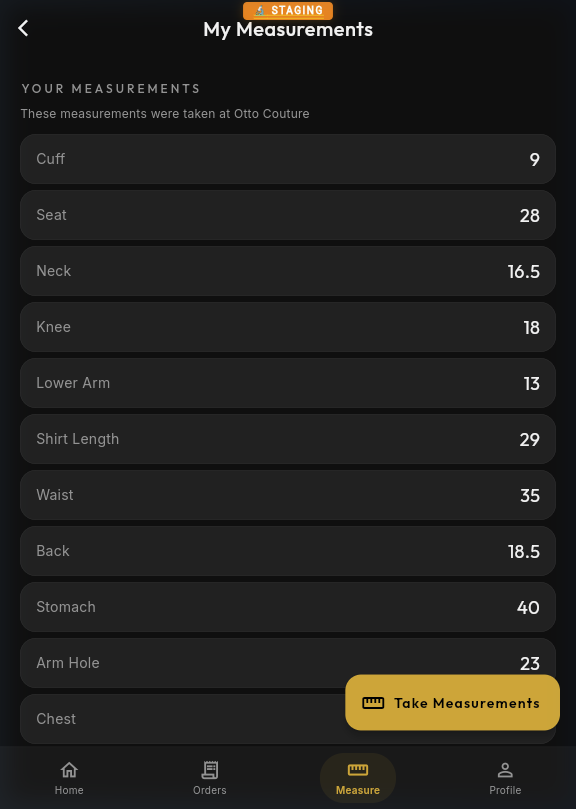
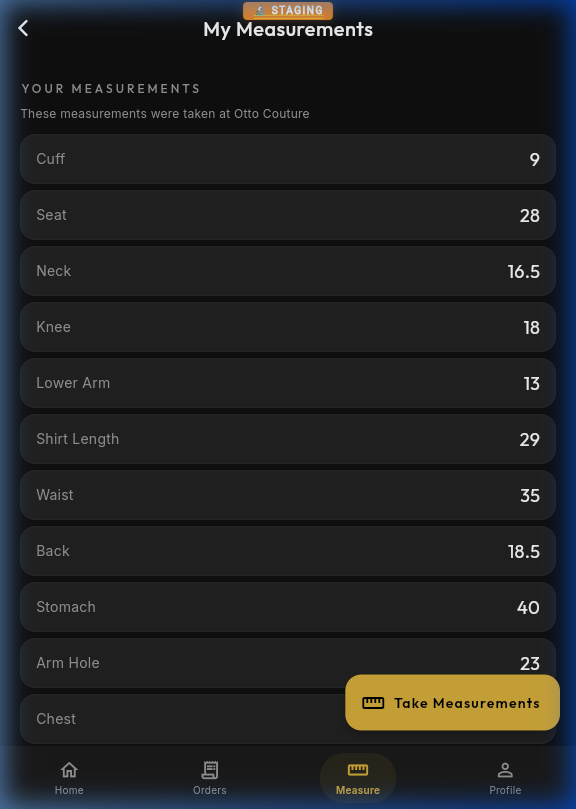
Customers can view and update their body measurements. The tailor can also update these remotely — changes sync instantly.
Body measurement management
B5
Profile
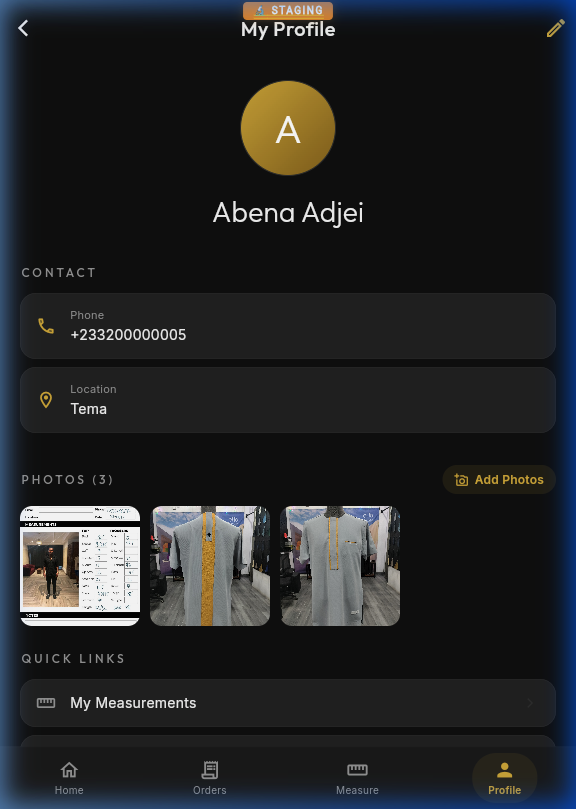
Manage personal information, view account details, and access the Gold Membership tier for premium benefits.
Customer profile page
B6
Gold Membership
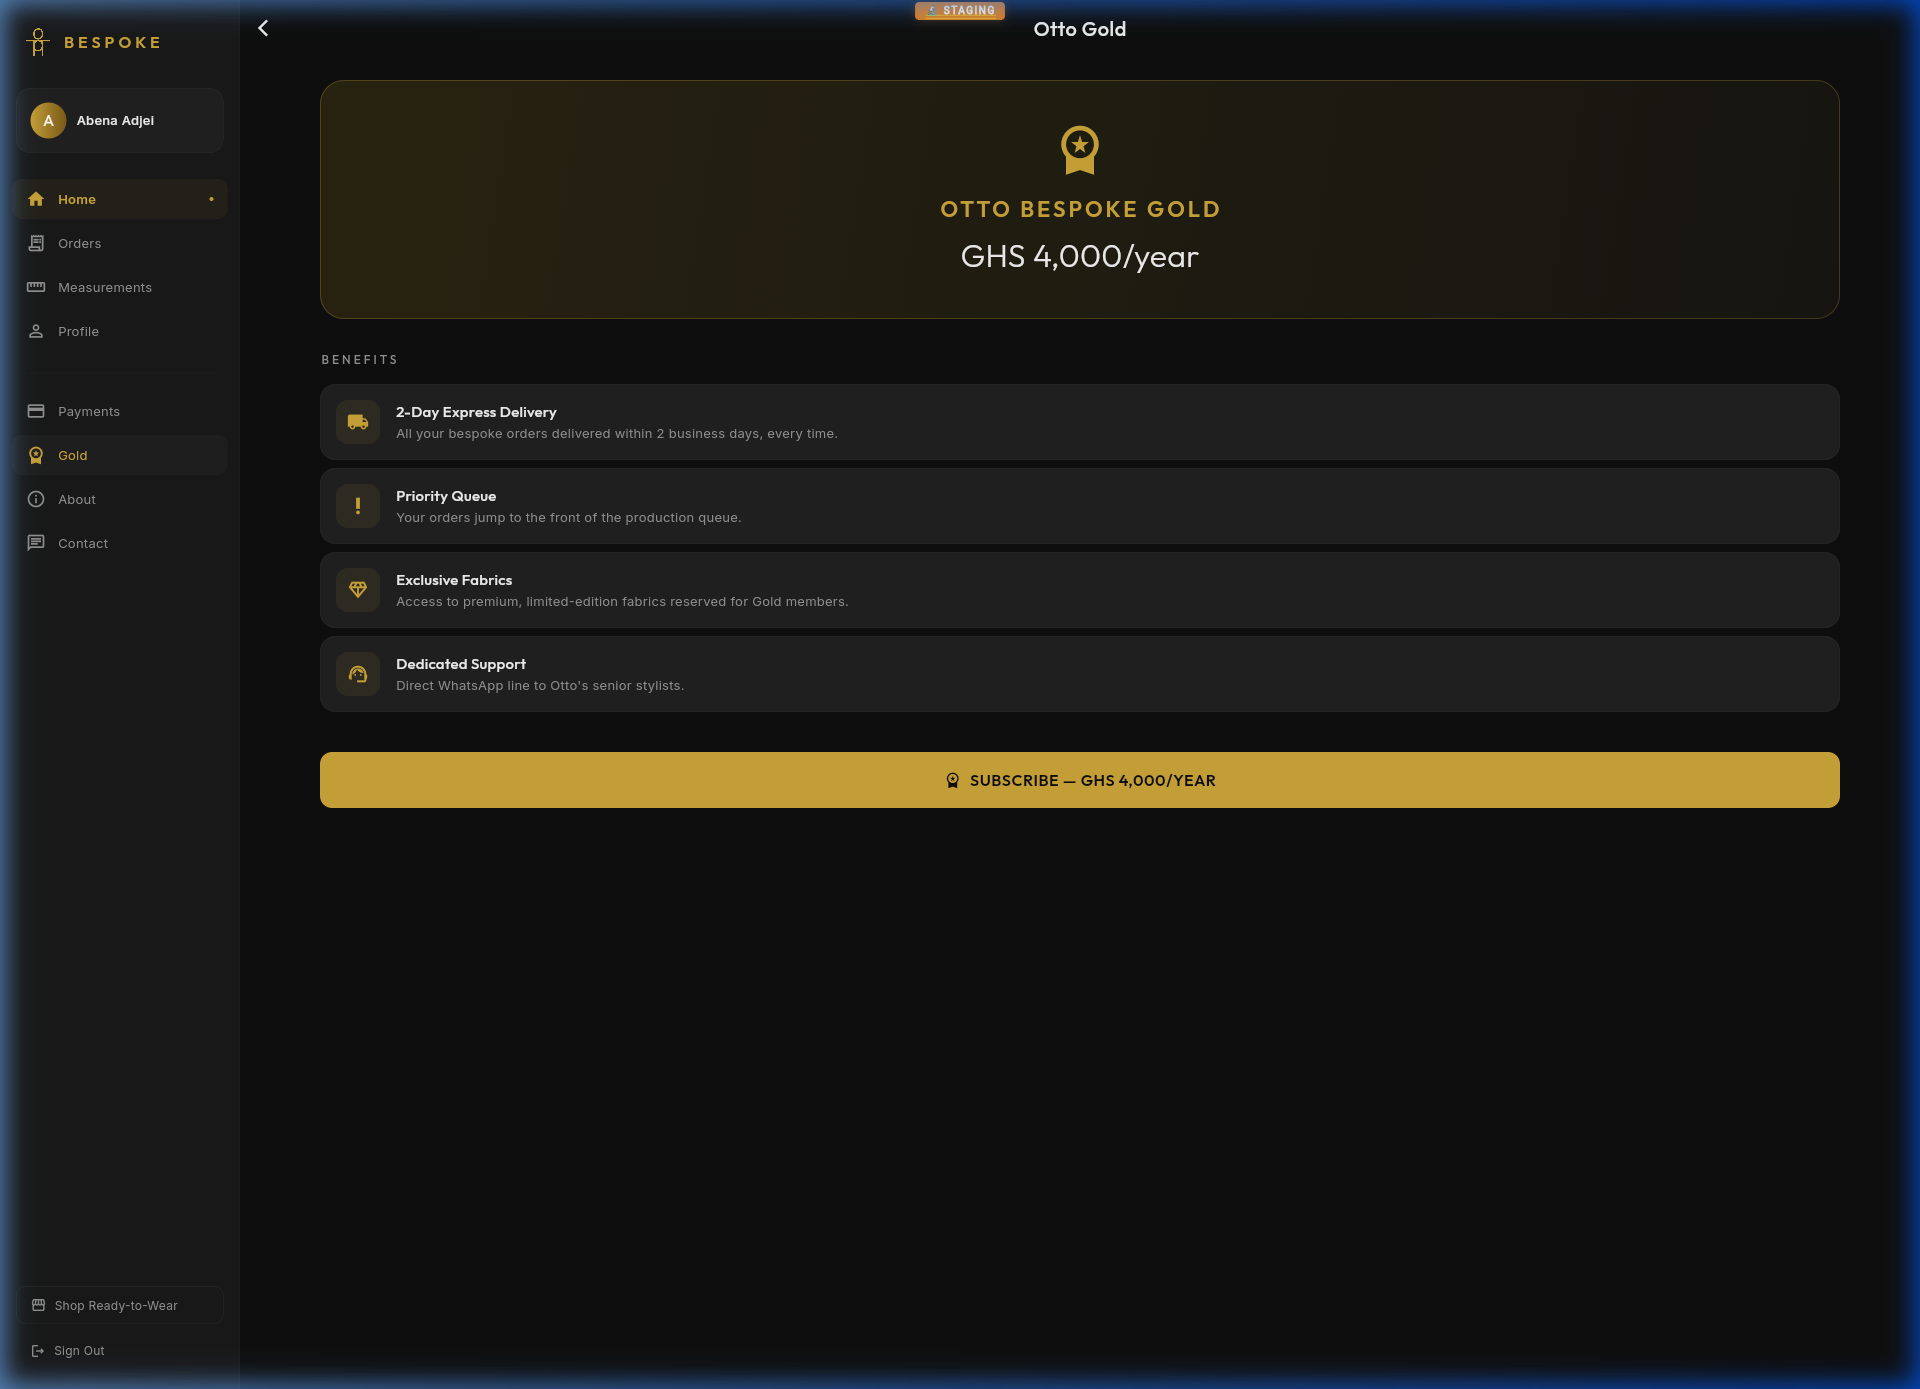
BeSpoke Gold is a premium annual membership that unlocks exclusive benefits for loyal customers. The price and perks are configured per shop.
BeSpoke Gold — premium membership page
Benefits
2-Day Express Delivery — All bespoke orders delivered within 2 business days
Priority Queue — Your orders jump to the front of the production queue
Exclusive Fabrics — Access to premium, limited-edition fabrics reserved for Gold members
Dedicated Support — Direct WhatsApp line to your shop's senior stylists
Video Tutorials
V1
Admin App Walkthrough
Watch a complete walkthrough of the BeSpoke Admin app — from the dashboard through orders, customers, calendar, and business reports.
1 / 8
V2
Bespoke Portal Walkthrough
See how customers experience the Bespoke portal — from the premium landing page through login, dashboard, orders, and measurements.
1 / 8
V3
Cross-App Flow
See how admin actions are instantly reflected in the customer's Bespoke portal — from order management and invoice generation to the customer's real-time view.
1 / 6
How it works: When an admin records a payment, sends an invoice, or marks an order complete, the customer sees the update instantly in their Bespoke Portal — no sync delay, no manual refresh.
Need Help?
H1
Getting Help & Sharing Ideas
BeSpoke is designed to be self-service, but we're always listening. Whether you've hit a problem, have an idea for a new feature, or want to tell us something is confusing — your voice shapes the product. Here's how to reach us:
This Manual — You're reading it! Available anytime at bespokegh.com/manual. Also accessible from the app's Profile page.
In-App Feedback — Tap the feedback icon in the navigation bar to report a bug or request a feature. It's always visible — on the bottom bar (mobile) or side rail (desktop). Your report includes automatic context so the team can act fast.
Issue Tracker — View all reported issues and track progress at bespokegh.com/feedback. Every report is visible so you can see what's being worked on.
Your feedback shapes what we build. Every feature in BeSpoke started as a user request. From AI scanning to WhatsApp invoices, real shops told us what they needed. Don't hold back — even small suggestions matter. Tap the feedback icon now and tell us what would make your life easier.
H2
Feedback, Bugs & Feature Requests
BeSpoke includes a built-in feedback system that makes it easy to report problems and suggest improvements. It works in both the Admin App and the Bespoke Portal — and it's how the platform gets better every week.
Reporting a Bug
Something broken? A button not working? An order not showing up? Report it in seconds:
Tap the feedback icon in the navigation bar — bottom of the screen on mobile, or next to settings in the side rail on desktop.
Select Bug as the type.
Enter a brief title describing the problem (e.g., "Payment not saving" or "Calendar won't load").
Add a description with more detail — what you were doing, what you expected, and what actually happened.
Tap Submit — the app automatically captures your context (see below).
Requesting a Feature
Have an idea that would make your workflow faster or your shop run smoother? We want to hear it!
Tap the feedback icon in the navigation bar.
Select Feature as the type.
Describe what you'd like — be as specific or general as you want.
Tap Submit.
Feature Request Examples
Not sure what to ask for? Here are real examples of features that came from user feedback:
"Can I scan my handwritten measurement forms instead of typing them in?" → We built AI Form Scanning
"I want to send WhatsApp messages when orders are ready" → We built WhatsApp integration with invoice sharing
"Customers should be able to pay online" → We built Paystack & Stripe online payments
"I need to see my revenue trends" → We built Business Reports with charts and export
"Show me all my jobs on a calendar" → We built the Job Calendar with day/week/month views
Every one of these started as a simple feedback submission. Your idea could be the next feature we build.
What Gets Captured Automatically
You don't need to manually include any of these — the app records them for you to help the team resolve issues faster:
Page — Which screen you were on when you submitted
App Version — The exact version of the app you're using
Device/Browser — Whether you're on mobile web, desktop, iOS, or Android
Your Identity — Your name, phone, and role (so the team can follow up or test with your setup)
Shop — Your shop name and ID, so the team can reproduce issues in your specific context
App — Whether you submitted from Admin or Bespoke Portal
Tracking Your Issues
All submitted feedback is visible at bespokegh.com/feedback. Sign in with your phone number to:
View your submissions — See all bugs and features you've reported
Track progress — Watch as issues move from Open → In Progress → Resolved
Filter by type — Bugs, features, or both
Filter by app — Admin, Bespoke Portal, or all
See what others reported — All feedback is public so you can see the full backlog
Issue Lifecycle
Every issue goes through these stages:
●Open — Newly submitted, waiting for review
●In Progress — Being actively worked on by the team
●Resolved — Fixed and deployed — try it out!
●Closed — No longer relevant, duplicate, or won't fix (with explanation)
Tips for Great Feedback:
For bugs: Include what you were doing, what you expected, and what actually happened. Screenshots help!
For features: Describe the problem you're trying to solve, not just the solution. This helps the team design the best approach.
Be specific: "Payments page is slow" is good. "Payments page takes 10 seconds to load on Chrome mobile" is even better.
Have feedback right now?
Open the app and tap the feedback icon in the nav bar, or visit the tracker below.